170 rebuild first start - wet! (Update: now dry)

Having problems with a Seagull? - ask an expert here

Moderators: John@sos, charlesp, Charles uk, RickUK, Petergalileo

andrew
Site Admin
Posts: 171
Joined: Wed May 24, 2017 5:37 pm
Location: ..

170 rebuild first start - wet! (Update: now dry)

Post by andrew »

First time starting this one after a full rebuild a couple years ago. Replaced piston & rod (remembering the wire https://www.saving-old-seagulls.co.uk/p ... tem#p63459). New gaskets/hoses/etc top to bottom.

30 mins of pulling the starter, occasional misfire/backfire, tinkering with one thing or another before I realize the cylinder head nuts are only hand tight. Started easily on the first pull once tightened up. Idles perfectly, pumps plenty of water at idle. One of the quieter seagulls I’ve heard, even with cowling off.

But — it definitely needs some work sealing the head! You can see bubbles in several spots around the cylinder head and even coming out the studs.
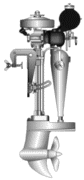
170 head leaking water
This one had a fair amount of rust I had to remove in the cylinder waterways, so the mating area between cylinder and head is reduced. The cylinder is near the limit of what I think should be good enough to run reliably, and will need to be replaced at some point for sure. For now my goal is to get it running to use a few times this summer.

I’ve not seen a head leak water like this before. It doesn’t seem to impact how the motor runs, though given it is a 170 I didn’t rev it up in the bin. I’m hoping it’s just a poor seal on the outside edge of cylinder and head, which can be fixed by a slightly larger gasket or maybe some liquid gasket seal.

Any thoughts out there on what to look out for in this type of situation? I’ll grab a couple photos when head is off.
User avatar
Charles uk
Posts: 4955
Joined: Wed Feb 27, 2008 4:38 pm
Location: Maidenhead Berks UK

Re: 170 rebuild first start - wet!

Post by Charles uk »

Bubbles would imply compression leakage, are you home or away, if in BM show it to Brian Lightbourne he certainly knows all about 170 powerheads & buy yourself a tube of RTV Silicon gue.
Make it idiot proof and someone will make a better idiot.
andrew
Site Admin
Posts: 171
Joined: Wed May 24, 2017 5:37 pm
Location: ..

Re: 170 rebuild first start - wet!

Post by andrew »

Have decided to give some high temp RTV silicon a try, despite the warning on back that says not to use on cylinder heads…what could go wrong!

This one ran fine for 15 mins in the barrel, so assume water was only leaking out the perimeter of the block, not into the sleeve itself. Though higher RPMs under regular use = higher water pressure I assume, so I need to make sure it’s sealed all in/around the head.

Question for the forum is, can I get the RTV reasonably close to the sleeve itself when sealing the head? A few mm out I’m thinking. My assumption is that seagulls run relatively cool so hopefully won’t have an issue with burning at that distance.

Will post photos when the deed is done.
User avatar
Collector Inspector
Posts: 4183
Joined: Sun Jun 29, 2008 4:32 am
Location: Perth Western Australia
Contact:

Re: 170 rebuild first start - wet!

Post by Collector Inspector »

Never ever been a fan of RTV anywhere...past posts etc.

Just remember that what you wipe off on the outside is in probably more the inside.

Can be problematic...

B
A chicken is one egg's way of becoming others
andrew
Site Admin
Posts: 171
Joined: Wed May 24, 2017 5:37 pm
Location: ..

Re: 170 rebuild first start - wet!

Post by andrew »

Not sure I have any other options with this cylinder? Happy to take advice! Don’t need it to work forever, just for a couple summer runs.

Other options I considered but decided not to pursue:

1. Doubling up head gasket. Would maybe fix external water leak but suspect lower compression and possibly water leak into sleeve due to larger spacing between cylinder and head.

2. Sanding top of cylinder/edges to get flatter mating with the head. As you would do to get better mating on crank casings, with sandpaper on flat glass table surface. But I think the sleeve protrudes from top of cylinder, which will complicate/prevent this approach.

3. Replace cylinder. Definitely want to go this route eventually, but they are rarely available and then usually on working motor themselves anyway.
User avatar
Charles uk
Posts: 4955
Joined: Wed Feb 27, 2008 4:38 pm
Location: Maidenhead Berks UK

Re: 170 rebuild first start - wet!

Post by Charles uk »

Where are you Andrew? BM?

If your in BM go down to Spanish Point boat club on the early afternoon of the 18th as it's the RISR, take the disassembled motor with you

Can you post a picture of the clean top face of the cylinder & head so we can access the surface condition.
Make it idiot proof and someone will make a better idiot.
andrew
Site Admin
Posts: 171
Joined: Wed May 24, 2017 5:37 pm
Location: ..

Re: 170 rebuild first start - wet!

Post by andrew »

Took the head off today, but forgot to take a photo while it was off.

Outer edge is down to 2mm in a couple places on the mating surface, but enough to get a bead of RTP on it all around.

Inner surface around the sleeve in better condition, and didn’t see any carbon markings etc leaking out from the piston so think that part is OK.

Will give it a run and see. I’ll get a compression reading as well.
User avatar
Collector Inspector
Posts: 4183
Joined: Sun Jun 29, 2008 4:32 am
Location: Perth Western Australia
Contact:

Re: 170 rebuild first start - wet!

Post by Collector Inspector »

This is all so confusing.

Best of luck in your whatever.

We need some detail pics to say one way or the other aye.

Like to help you.

Regards

B
A chicken is one egg's way of becoming others
andrew
Site Admin
Posts: 171
Joined: Wed May 24, 2017 5:37 pm
Location: ..

Re: 170 rebuild first start - wet!

Post by andrew »

A quick video showing the red high-temp RTV sealing the outside of the head. This motor starts, idles, runs very well in the bin. In and out of gear without having to rev it up a bit like the other FNR gearbox motors I have. Very smooth running overall.

Next up, sea trials...

User avatar
Charles uk
Posts: 4955
Joined: Wed Feb 27, 2008 4:38 pm
Location: Maidenhead Berks UK

Re: 170 rebuild first start - wet!

Post by Charles uk »

That isn't the way you use RTV, a very thin wipe around the the surface of the inner ring of the head (the fold over portion) gasket, both faces, & the same on the outer 3mm strip to prevent any water loss.

If it's squeezing out you've used too much & the excess could come loose & block the tell tale or the cooling flow around the inner exhaust!
Make it idiot proof and someone will make a better idiot.
andrew
Site Admin
Posts: 171
Joined: Wed May 24, 2017 5:37 pm
Location: ..

Re: 170 rebuild first start - wet!

Post by andrew »

Agree with your recommend application in almost all cases. Absolutely the right advice. However it's a live or die situation for this cylinder :lol:

Discovered some pitting on outer edge mating surface = extra RTV or the trash bin are my options in the near term. Until I find a new one this is what I have to work with, on a novelty motor that will realistically not get more than a couple hours' use.

RTV applied to the last ~1mm of the outer edge only, ensuring that excess would mostly squeeze out not in. Excess not wiped away as I think it's probably not hurting and I don't care to hide the quality of the cylinder/situation here. Inside I didn't need to apply any, the copper gasket is doing it's job fine there.

I doubt there is much if any RTV in the water passages given how it was applied to the very outer rim only. But, of course that's a possibility yet I'd rather have that issue while driving on the water, than to stay on land and not. A matter of priorities I guess! This motor will not be going far from shore in this condition.

Still looking for a 'new' cylinder as a proper long-term solution if anyone on the forum has one to sell.
User avatar
Charles uk
Posts: 4955
Joined: Wed Feb 27, 2008 4:38 pm
Location: Maidenhead Berks UK

Re: 170 rebuild first start - wet!

Post by Charles uk »

How much piston @ TDC to cylinder head clearance do you have?
Make it idiot proof and someone will make a better idiot.
andrew
Site Admin
Posts: 171
Joined: Wed May 24, 2017 5:37 pm
Location: ..

Re: 170 rebuild first start - wet!

Post by andrew »

Not measured. Are you thinking that shaving it down a tad could improve the mating?
andrew
Site Admin
Posts: 171
Joined: Wed May 24, 2017 5:37 pm
Location: ..

Re: 170 rebuild first start - wet!

Post by andrew »

Also, any idea what this Carburettor Shield does? It it a heat shield?
Attachments
IMG_5851.jpeg
User avatar
Charles uk
Posts: 4955
Joined: Wed Feb 27, 2008 4:38 pm
Location: Maidenhead Berks UK

Re: 170 rebuild first start - wet! (Update: now dry)

Post by Charles uk »

It's there to prevent fuel drips from the carb landing on the hot head & sparkplug, catch on fire & not be seen as it's under the cover.

To measure the head piston clearance try first with a 4 inch length of multi core solder & poke through the spark plug hole to the cylinder wall,
rotate 1 revolution by hand on flywheel, a single strand should show no sign of touching, try 2 strands twisted together tidily & try again if that doesn't get squeezed, try 3 strands when it gets squeezed, measure the clearance, now do it again with a new 3 strand bundle & measure again just to be sure you got it right. Minimum clearance 1.4 mm with a standard 170 con rod with good big end.


Now you'll know the maximum you can remove from the top of the cylinder walls!
Make it idiot proof and someone will make a better idiot.
Post Reply