Page 1 of 1
First steps with a 102
Posted: Sun Jun 06, 2021 11:24 am
by Methersgate
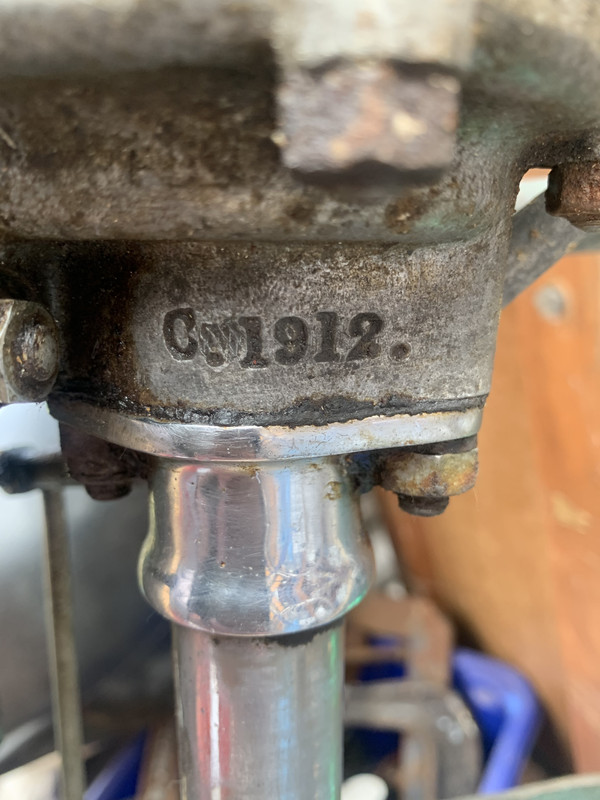
I am starting to become addicted. Having a perfectly nice 40 Plus, I wondered if I were up to the challenge of restoring an early 102, and I have just acquired C.1912, from 1946, which has spent the last forty years on the floor of a garage.
Everything seems to be present, apart from the induction silencer/choke body that ought to screw onto the Amal 2 jet here:

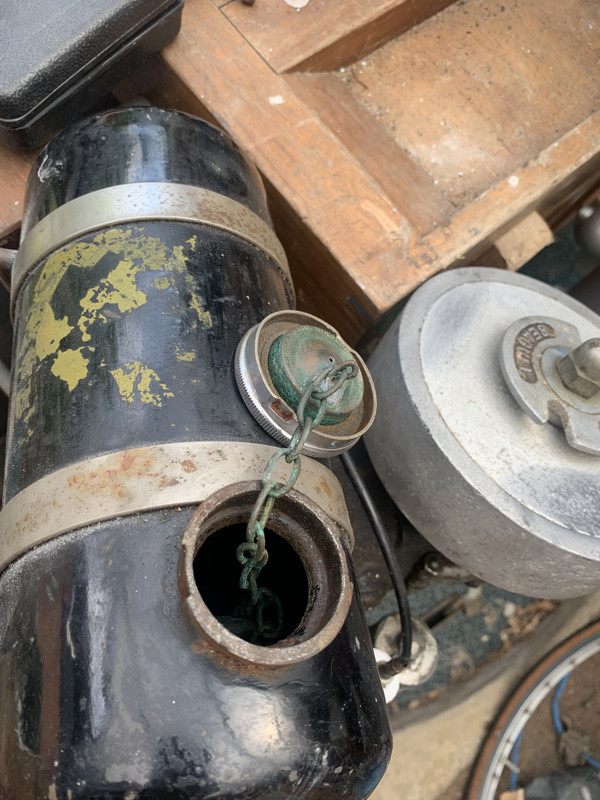
The tank filler is not one that I have seen before; it looks like a motorcycle type, made by Ceandess Ltd,Wolverhampton. It is nicely made but it looks as if the filler tube is mild steel soldered onto the brass tank, which is seldom a good plan in the marine environment! The filler cap can be closed completely or if given a quarter turn it pops up thanks to an internal spring and the breather can operate. To open the cap, press down and give it a full half turn. A more elegant design than the separate breather screw.
It is impossible to tell which way the seagull was facing:
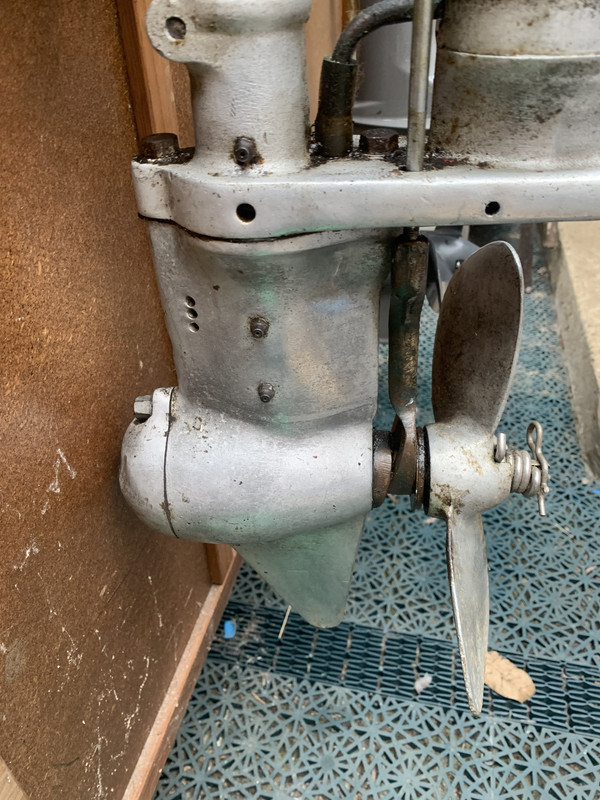
There are two grease nipples on the gearbox, and of course a bow tie propeller.
Sadly whilst I hoped that it might claim to be “The best outboard motor in the world”, it makes no claims at all!
It turns and has some compression. I am going to start by cleaning it.
Re: First steps with a 102
Posted: Sun Jun 06, 2021 11:38 am
by Methersgate
If I am going to do a proper job on this, I am going to have to get the leg and the exhaust pipe re-chromed. I assume that the Villiers coil is long dead, and I am watching Amal two jet carburettor videos.

Correction: there are
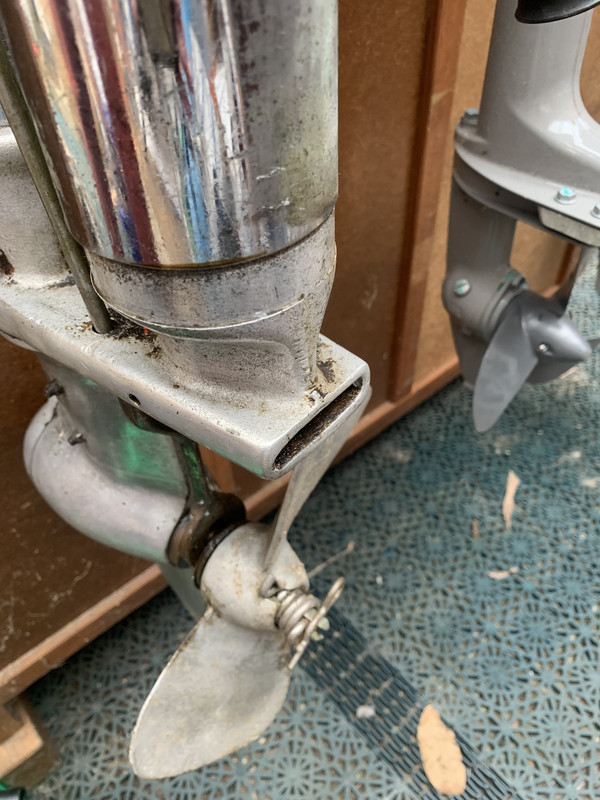
three grease nipples:
I think the “straight through tailpipe” is an early feature?
Re: First steps with a 102
Posted: Mon Jun 07, 2021 10:06 am
by Oyster 49
Nice find

The C models were a very early post war engine, which were quickly superceded by the AC (Clutched) and AD (direct drive) So a fairly desirable model to restore.
The filler cap is not correct, it should have a vent screw in the middle, these are hard to find, I made some new ones a while back as the Ceandess caps are still made.
The prop you have there is from a later 102, you should have a 2 blade "swept" prop as fitted to SD engines.
Re: First steps with a 102
Posted: Mon Jun 07, 2021 10:11 am
by Oyster 49
Here's the prop you need.
Re: First steps with a 102
Posted: Mon Jun 07, 2021 10:54 am
by Methersgate
Thank you!
I am at the start of a very steep learning curve and I am going to need lots of help.
I think it’s in a condition where a full rebuild is in order - it can be a restoration but it is past the point where “keeping it original” is practical.
The top of the flywheel is flat. I can’t see any trace of lettering on it. There was some text on the tank but it’s extremely hard to make out.
Re: First steps with a 102
Posted: Mon Jun 07, 2021 7:43 pm
by Oyster 49
Keeping it original is extremely practical actually, parts are generally available, and supporting these engines is what this forum is all about
For example new replacement decals are available from SOS for the petrol tank, correct period fuel pipes can be made easily. Your engine would have had a plain flywheel top.
There is a school of thought of course to do an oily rag restorations, that's what I generally do now if I can.
Also dont fall into the trap of putting grease into the gearbox nipples, they are actually oil nipples and a heavy grade oil such as 140 should be used.
Re: First steps with a 102
Posted: Mon Jun 07, 2021 9:47 pm
by Methersgate
Thanks for the further insights!
Cross purposes… by “keeping it original” I meant “not repainting it, etc.”
I hope to bring it back to something like the state it was in when it left Poole, but I do intend to use it, so an “oily rag” restoration!
I had a surprise as I removed further layers of crud, this evening. The bolts and nuts holding the crank case together appear to be stainless steel! As is the cooling water to silencer tube.
I wonder whether at some point in the distant past this engine might have been sent back to Poole for servicing, and whether that might account for the Ceandess filler cap and the later propeller?
Re: First steps with a 102
Posted: Mon Jun 07, 2021 11:54 pm
by Charles uk
Test the crankcase nuts & the water delivery tube with a magnet, I've worked on several of this model all of them had chromed mild steel nuts & bolts with chromed copper water delivery tubes.
The brass tank with a bayonet cap was standard on many of this series & later ones had the bow tie prop, if you use SAE 140 in the lower unit which we believe was designed to run on Castrol K70, (the nearest viscosity I've been able to locate is SAE 460 which is less viscous), you'll end up with a puddle as the bearing clearances seems to be greater from new.
Re: First steps with a 102
Posted: Tue Jun 08, 2021 2:25 pm
by Methersgate
Thank you Charles. Indeed - mild steel with good quality chrome plating.
I have not tried peering into the gearbox yet but I assume that whatever was in it forty years ago is long gone!
Peering into earlier threads I found a recommendation to use stern seal oil. Big ship stern seal oils have changed in recent years, with the adoption of biodegradable formulations, but that probably doesn’t affect the viscosity. However they tend to come in pallets of two hundred litre drums!
Re: First steps with a 102
Posted: Tue Jun 08, 2021 9:12 pm
by Methersgate
An American friend uses this stuff, which seems ideal:
https://phillips66lubricants.com/product/steaval-d-150/
Re: First steps with a 102
Posted: Tue Jun 08, 2021 9:59 pm
by Charles uk
Apart from it not being viscous enough & it's non-emulsifying.
Re: First steps with a 102
Posted: Wed Jun 09, 2021 1:04 pm
by Methersgate
Charles uk wrote: ↑Tue Jun 08, 2021 9:59 pm
Apart from it not being viscous enough & it's non-emulsifying.
Oh, well…

I think I saw a recommendation from, I think, John, to try a mixture of SAE 140 and grease?
I certainly don’t like the idea of using a graphited lubricant in any marine application
