
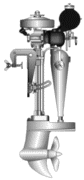
I've had this engine for quite a while, but have finally got around to doing some work on it over the last 2 winters. So I'll show the work done bit by bit, and the issues found.
First job was to do a general clean and check over, followed by taking a close look at the transom bracket. It was mostly all there, but several seized up fasteners to deal with. It had a broken and seized screw in place, which came out with a little heat and gentle persuasion, followed by re-cutting the threads and fitting new screws, I had obtained replacement transom screws and pads from the Marston Register.
The corroded cross brace bar on the transom bracket was pretty nasty and corroded, so I made a new one out of stainless, which polished up close to the original chrome.
Then a general clean and scrub of the bracket body, before reassembling, all threads freed and threads chased, and greased.
More to follow...
Marston OG rebuild
Moderators: John@sos, charlesp, Charles uk, RickUK, Petergalileo
Marston OG rebuild
- Attachments
-
-
-
-
-
- iCloud Photos (6).zip
- (2.48 MiB) Downloaded 133 times
Last edited by Oyster 49 on Wed Nov 08, 2023 9:46 pm, edited 3 times in total.
Re: Marston OG rebuild
Finished bracket, cleaned, repaired and new parts fitted. Now 100% serviceable and functional.
- Attachments
-
-
-
-
Collector Inspector

- Posts: 4183
- Joined: Sun Jun 29, 2008 4:32 am
- Location: Perth Western Australia
- Contact:
Re: Marston OG rebuild
I am going to learn about these aye. Following with interest
B
B
A chicken is one egg's way of becoming others
Re: Marston OG rebuild
Next job after sorting out the transom bracket was to restore the rusty cylinder. A good degrease using washing up liquid and hot water, followed by a flush of the waterways.
To paint, prepare using a wire brush and rubbed down with emery paper. Then a coat of kurust to treat the corrosion, then a coat of etch primer, then 2 coats of VHT paint. Finally an hour on top of the log burner to cure the paint. A big improvement.
To paint, prepare using a wire brush and rubbed down with emery paper. Then a coat of kurust to treat the corrosion, then a coat of etch primer, then 2 coats of VHT paint. Finally an hour on top of the log burner to cure the paint. A big improvement.
- Attachments
-
-
-
-
-
Re: Marston OG rebuild
Next job was to strip and examine the carb, which was missing the small brass shaft that connects the carb to the gear linkage. With this model when you put the engine into gear, it automatically opens the throttle to whatever the throttle lever is set to. Drop it into neutral and the engine drops to tickover, set via the tickover screw on the carb. Clever  This is why this model has a cutout button on the tiller.
- Attachments
-
-
Collector Inspector
- Posts: 4183
- Joined: Sun Jun 29, 2008 4:32 am
- Location: Perth Western Australia
- Contact:
Re: Marston OG rebuild
Yes, simple but clever. They did away with the FNR engines when they decided the reverse gear was rarely used and not needed and could save money. What a shame! The carb has a drain valve which is a great feature also.
-
Collector Inspector
- Posts: 4183
- Joined: Sun Jun 29, 2008 4:32 am
- Location: Perth Western Australia
- Contact:
Re: Marston OG rebuild
That little thing.....drain tap?
What a wonderful addition.
0A262 has one.
By the way I still need either a 0.020 over piston for the block...OR a standard 50mm block?
Over many years nobody wants to help me with a 50mm block? Is this such a special club?
The 0.020 block I have is otherwise pristine by the way.
Get me a standard barrel and everything done and dusted...I can actually use it (OA262)
Your project is proceeding nicely by the way.
[/color][/color][/color][/b]
B
What a wonderful addition.
0A262 has one.
By the way I still need either a 0.020 over piston for the block...OR a standard 50mm block?
Over many years nobody wants to help me with a 50mm block? Is this such a special club?
The 0.020 block I have is otherwise pristine by the way.
Get me a standard barrel and everything done and dusted...I can actually use it (OA262)
[/color][/color][/color][/b]
B
A chicken is one egg's way of becoming others
Re: Marston OG rebuild
Can you get oversize pistons? I don’t recall ever seeing oversize blocks or pistons for any seagull? Could you look at Villiers engines from the 1930s that might have used a similar piston, perhaps with a bit of machining to make it fit?
-
Charles uk
- Posts: 4955
- Joined: Wed Feb 27, 2008 4:38 pm
- Location: Maidenhead Berks UK
Re: Marston OG rebuild
Bruce, we can list your standard size cylinder on the Marston Wish List should you require one, hate to think what one will cost.
This is the least common of all the Marston cylinders.
As I've never heard any mention of a 50mm 20 oversize piston with ring gaps suitable for a series one OA
This is the least common of all the Marston cylinders.
As I've never heard any mention of a 50mm 20 oversize piston with ring gaps suitable for a series one OA
Make it idiot proof and someone will make a better idiot.
-
Collector Inspector
- Posts: 4183
- Joined: Sun Jun 29, 2008 4:32 am
- Location: Perth Western Australia
- Contact:
Re: Marston OG rebuild
Thanks guys.
My block is 20 over.....the piston is standard 50mm....have no idea why.
Charles. Remember the block I sent you?
Wish I still had it aye.
Back to the 0G now. Not diverting this topic any more. I will reopen my initial wanted.
B
My block is 20 over.....the piston is standard 50mm....have no idea why.
Charles. Remember the block I sent you?
Wish I still had it aye.
Back to the 0G now. Not diverting this topic any more. I will reopen my initial wanted.
B
A chicken is one egg's way of becoming others
Re: Marston OG rebuild
A new piston could be made from solid bar of course.
Re: Marston OG rebuild
Next job was to strip the magneto, all fairly routine as its the same as later engines. The coil was of course dead, but new ones are available. Its always a good idea to apply a little heat, as a steel thread in an alloy casting will most like be seized. I even have a tiny torch with runs on lighter fuel, similar size to a big cigar
- Attachments
-
-
-
-
Re: Marston OG rebuild
Next job was to investigate the gearbox, and would the end cap come off? I was hopeful as the FNR gearbox does not have the water pump behind the cap, so less chance of deep corrosion in the threads. Eureka!, it came off easily  A full degrease and clean, and generally all in very good condition.
- Attachments
-
Re: Marston OG rebuild
Next job was to give the crankcases a bit of a clean, and replace the tiller stub which had sheared. The original was made from monel, which is hard to find, luckily a brass SD one is identical. The treads in the crankcase for the tiller stub needed a light clean up by passing a tap through.
- Attachments
-
-
-
-