Villiers Coil Substitution

Having problems with a Seagull? - ask an expert here

Moderators: John@sos, charlesp, Charles uk, RickUK, Petergalileo

User avatar
Jerry In Maine
Posts: 140
Joined: Thu Aug 12, 2010 3:19 am
Location: Surry, Maine USA

Villiers Coil Substitution

Post by Jerry In Maine »

Folks here recently helped me diagnose a defective Villiers ignition coil in a 40+ I've just restored/rebuilt. I took a coil off another engine in order to get it running. Looked up the price of a new Villiers coil and found them to run about $80.00+ delivered to the U.S. :shock:

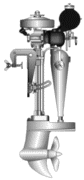
Seems that this is the only weak link with a Villiers equipped Seagull you rely on to get you home. I can rebuild the carb, install new rings and gaskets, set the points and spark gap correctly all in the hopes of having a reliable engine - just to have the coil die and leave me stranded anyway.

Got to thinking that maybe there a modern coil from some sort of magneto equipped device that might work and cost less. Took a look on eBay and found one that looked like it might work. Its a replacement motorcycle part used on 50 & 100 cc engines. I "Bought It Now" for $12.49 (~8 £) and got it in 5 days. You can see it here:

http://cgi.ebay.com/ebaymotors/ws/eBayI ... MEWNX%3AIT

To to see if the effort was warranted I just stuck everything together temporarily. I gave the flywheel a twist by hand and got a nice fat spark from the plug. I can't quantify the voltage, but I've messed around with small engines long enough to know that what I saw was enough to run an engine. I don't remember getting this much spark off a similar hand-twirl with a Villiers coil, so I think this coil might be a bit "hotter".

I don't know if I'm re-inventing the wheel here. Could very well be that someone's already been down this path. If not I'll post pics and a description of what it takes to get the coil installed permanently. Can someone let me know?

I'm using the rule that no major "un-doable" mods are to be made to the ignition plate and the engine must not reflect any change in its outward appearence.
User avatar
Todd
Posts: 131
Joined: Tue May 05, 2009 6:52 pm
Location: Maine, USA

Re: Villiers Coil Substitution

Post by Todd »

J.I.M. -

Great project. You may be onto something really useful. If, however, you find need another option, you might check with this fellow in Massachusetts:

http://www.magnetoparts.com/index.html

I don't know anything about him, I just have his site bookmarked in case I ever need his services.

T.A.I.M (Todd, also in Maine)
redex
Posts: 1
Joined: Sat Oct 09, 2010 6:42 pm
Location:

Re: Villiers Coil Substitution

Post by redex »

Hi, how did you wire the coil up ? I am looking at converting a 1939 Villiers engine in a similar way as I believe I may also have magneto probs.
User avatar
Jerry In Maine
Posts: 140
Joined: Thu Aug 12, 2010 3:19 am
Location: Surry, Maine USA

Re: Villiers Coil Substitution

Post by Jerry In Maine »

I recently approached a coil rewinder shop here in Maine about re-manufacturing defunct Villiers coils. They said that they could do them but the cost would be well over what Villiers was selling them for.

I'll post a blow-by-blow description w/ pics of what I'm doing with the motorcycle coil, but it isn't hard. The coil had the breaker points and high-voltage connections ready to go - similar to the Villiers coil, just in different places. Only thing you really have to do is get a coil thats made for a magneto ignition (no battery) that'll fit between the iron shoes where the old coil went. Mine didn't - I must have measured incorrectly - but I can make it work with a little effort.

You need to make good, physically solid and electrically low resistance connections from the shoes to the core of your coil, but even with that warning mine sparked nicely when I just pushed parts together. I have a crankcase/crankshaft/ignition plate assembly in my bench vise. I fitted the coil, made connections to the points and plug, replaced the flywheel and gave it a spin by hand. I was rewarded with a nice fat spark even under these makeshift conditions. This is why I think the MIGHT be a bit "hotter" than the Villiers. Since she sparked nicely by hand I'll bet she's really spark when the motor is turning over at speed.

If there enough interest I might set up a little web reference where folks want to try different coils, test and send me the results. Could be we might wind up finding a coil that makes for a almost-no-effort replacement.

Whats nice is that no major changes need be made to the motor - at least nothing that can't be reversed. Also the replacment coil - like me, is cheap! Add to that increased reliability of the motor and possibly increased performance and this nonsense might just be worth the time.
Last edited by Jerry In Maine on Sun Oct 10, 2010 1:30 pm, edited 1 time in total.
User avatar
Rob Ripley
Posts: 442
Joined: Fri Mar 10, 2006 11:38 am
Location: Melbourne, Australia

Re: Villiers Coil Substitution

Post by Rob Ripley »

... I'll post a blow-by-blow description w/ pics of what I'm doing with the motorcycle coil,

Please do, as that might solve the same problem I'm having with a 102
User avatar
40TPI
Posts: 451
Joined: Fri Jan 26, 2007 7:08 pm
Location: North Buckinghamshire, 110 miles south of Yorkshire, England.

Re: Villiers Coil Substitution

Post by 40TPI »

Jerry In Maine wrote: You need to make good, physically solid and electrically low resistance connections from the shoes to the core of your coil, but even with that warning mine sparked nicely when I just pushed parts together.

A lot of posts to catch up with since returning so apologies for not picking up on this one earlier. Of possibly greater importance is ensuring a low reluctance magnetic path for the induced flywheel flux. (Roughly explained this means magnetic circuits conceptually behave a little like electrical circuits and have "resistance". Here we want to minimise the "resistance" in our magnetic circuit formed by the flywheel magnets, the air gaps, the cheek pieces and the core situated between them. ) This implies as large as possible surface area contact at each cheek piece. An electrical contact resistance of a few milliohms, whilst perfectly adequate for the primary current, does not guarantee a good low reluctance magnetic circuit if it is only a square millimetre or so in area. Implementation with a coil with a circular core section is therefore intuitively better than one with a square section in this respect. (In some cases the chassis connection to the primary may not be via the iron core and may well be presented as a separate wire connection. An electrical chassis connection is not
therefore required...........)
That said there is a good degree of latitude and with care it should not be too critical. There is certainly mileage in the idea of pressing into service an after market coil intended for another engine. A degree of caution should be exercised however since many of the coils offered are intended as either "single wire" ignition coils or CDI coils which would have been situated outside the flywheel compartment on the original engine and powered by a low voltage ignition winding on the flywheel stator plate and consequently not intended to be directly magnetically excited. The electrical winding topology may well be the same as an M1634 but the winding characteristics may not.

But obviously still worth a shot if your holding a duff Villiers M1634 in your hands and no likely genuine replacement candidates in your part of the world. Coils with square sectioned cores and drilled to take fixings suggest it was intended for frame mounting rather than stator plate but this is not a certainty, but if it works it works! Rejoice!


Peter
User avatar
Jerry In Maine
Posts: 140
Joined: Thu Aug 12, 2010 3:19 am
Location: Surry, Maine USA

Re: Villiers Coil Substitution

Post by Jerry In Maine »

i'd like to say that i selected this coil because i carefully considered its electrical parameters - but fact is, i just 'aint that smart :wink: . i picked it because it was cheap (again, like me) and it looked like it might fit. this effort was intended just too see if the idea had merit so i didn't want to invest too much of my hobby budget on it.

progress so far:
i stuck everything together temporarily and got a spark.

pulled everything apart. did some beard-stroking (it helps me think) about the best way to proceed and decided to tig-weld two small soft iron brackets to the shoes. these will support the new coil and will hopefully minimize the reluctance that 40TPI mentions. the coils square core-ends will extend into the round "sockets" in the shoes left void when the villiers round core was removed. each end of the new core has a hole for mounting which will be used to secure it to two small brackets attached to the existing shoes.

i chose to weld the brackets on because i have a tig welder in my shop and because i like to play with heat, smoke and fire and do so every chance i get. the brackets could just as easily be attached with small screws - but whats the fun, danger and potential of hurting yourself in that?

the breaker point connection is in the same location as it was with the villiers coil. the spark lead setup is different but presents no problems.

i'm taking pics as i go and will post them soon. hopefully they'll be one of my 40+ running on the new coil, but it'll have to be running in a barrel because the weather is getting a bit nippy to take the boat out.

one important note:
i'm not an engineer. i have some electronics experience from my 22 years, 4 months and 1 day in the us coast guard where i served as a repair technician. i love to tinker, i have plenty of time since i'm retired and have a decent shop so this sort of thing is right up my alley. hell, i'll have fun even if it doesn't work.

I'm not saying that the coil i have is the optimum choice for a seagull. Also not saying that the way i'm installing it is the best way to do it. All i'm doing to trying to get an old seagull running as inexpensively as possible.

i do hope that the effort might inspire folks more knowledgeable than me to possibly locate a coil better optimized to seagull use if there is one out there.
User avatar
Jerry In Maine
Posts: 140
Joined: Thu Aug 12, 2010 3:19 am
Location: Surry, Maine USA

Re: Villiers Coil Substitution

Post by Jerry In Maine »

went down to the shop - made the coil brackets, drilled them out, filed smooth, cleaned everything well then got set up to TIG weld and....wouldn't you know it, my &%*!$ argon gas bottle was empty :evil:

who left that &%*!$ valve open? :oops:

found that this particular might not work. turns out the plug wasn't sparking in time with the points. check the lead i had connected the points and its common with the coils core - meaning that the breaker points did not control the timing. i got spark when the flywheels magnets passed the shoes.

shopping now for a coil with a different configuration. this time i'll look for one off a lawn mower or similar...i believe the ignition setup on these motors is similar to that of a seagull. i have a small engine shop in town so i'll pay them a visit tomorrow.

if anyone has any more related info please let me know.
User avatar
40TPI
Posts: 451
Joined: Fri Jan 26, 2007 7:08 pm
Location: North Buckinghamshire, 110 miles south of Yorkshire, England.

Re: Villiers Coil Substitution

Post by 40TPI »

Jerry In Maine wrote: i chose to weld the brackets on because i have a tig welder in my shop and because i like to play with heat, smoke and fire and do so every chance i get. the brackets could just as easily be attached with small screws - but whats the fun, danger and potential of hurting yourself in that?
Welding to the cheek pieces is non reversible....?

Drilling and tapping into them is also non reversible but not as invasive.

If you end up with a square ended coil core again how about turning the coil core circular at each end in the lathe and adding a packing collar?


I think the gods left your valve open to give you more time to refine the choice of coil................................

PM me a Skype identity or landline number ? Maybe we can short circuit this..................?

Peter
Last edited by 40TPI on Mon Oct 11, 2010 12:29 am, edited 1 time in total.
User avatar
Rob Ripley
Posts: 442
Joined: Fri Mar 10, 2006 11:38 am
Location: Melbourne, Australia

Re: Villiers Coil Substitution

Post by Rob Ripley »

Would a different coil 'fatter spark etc", mean a different spec for the spark plug?
User avatar
Jerry In Maine
Posts: 140
Joined: Thu Aug 12, 2010 3:19 am
Location: Surry, Maine USA

Re: Villiers Coil Substitution

Post by Jerry In Maine »

welding to the cheeks is indeed very easily reversible - just grind the weld off and polish the surface smooth on the sander. drilled and tapped holes are much tougher to grind away.

you can't turn this coils core on a lathe since its laminated. its a stack of maybe 25 individual metal sheets. i believe this is to reduce wasteful eddy currents within the coil which can cause it to heat up.

i chose the coil i have mainly because it was cheap and looked as though it might have a chance. turns out it does spark very nicely - which gives me enough reason to think that this is worth the time trying other coils. could be that it isn't, but regardless its something to do.

have been looking at the magneto circuits in chainsaws. some use the same scheme to that used in seagulls and they're smaller too. hopefully the small engine shop will give me some chain-saw cadavers to take home as organ doners.
User avatar
40TPI
Posts: 451
Joined: Fri Jan 26, 2007 7:08 pm
Location: North Buckinghamshire, 110 miles south of Yorkshire, England.

Re: Villiers Coil Substitution

Post by 40TPI »

Jerry In Maine wrote: you can't turn this coils core on a lathe since its laminated. its a stack of maybe 25 individual metal sheets. i believe this is to reduce wasteful eddy currents within the coil which can cause it to heat up.
Eddy current losses are indeed I squared R resistive losses and therefore energy losses in the form of heat. However the heating and therefore potential temperature rise through eddy current losses in a Seagull magneto plate, given the metal/ocean thermal mass and overall energy transfer involved, is trivial. They are purposely laminated here to reduce the area under the B/H curve and hence losses with the end result that the spark energy is maximised for a given available flywheel magnet flux density across the engine RPM range.

The pic below, of one I photographed earlier, shows a circular section Villiers MK1 M1634 laminated core..............

Turning a stacked laminated square section could indeed prove problematic in a lathe. If high speeds ( way beyond text book cutting rates) and a thin cut won't hack it a tool post grinder would sort it. ( failing that take a leaf out of microwave oven tranny manufacturers production methods and get your welder out and weld up the lams at the end...........sorry, only joking.) Sadly we can't easily go back and ask Villiers how they did it on their cores...................

( Personally I suspect they ground theirs before adding cheek pieces ........)

If, as you suggest, your two wire coil has one wire connected directly to the core and the other is the spark plug wire then I'd think something is amiss and it is being wrongly sentenced. Was that conclusion reached using a DMM ? Two or four wire resistance measurement? Primary resistance being swamped by the DVM leads and probe contact resistance maybe?

At the moment I think your points are controlling this spark since dI/dt from a hand crank wouldn't be sufficient on it's own to get a fast enough current switching waveform. ( Recalling primary back emf E is described by -E=dI/dt)

No matter what we've covered I genuinely think this idea has potential and deserves following up. Go for it!

Peter
Attachments
Laminated core on Villiers type M1634 coil
User avatar
Charles uk
Posts: 4972
Joined: Wed Feb 27, 2008 4:38 pm
Location: Maidenhead Berks UK

Re: Villiers Coil Substitution

Post by Charles uk »

Jerry this is a very interesting investigation, but there is a strong possibility that these Chinese ignitions are full CDI's which don't use points, their timing is calculated from the wave form of the generated current.

The magnet position in the flywheel will set the timing, a new keyway is not very difficult or a new locating dimple in the crankcase.

So the wire that your using for the points could well be the stop button wire.

Could you post the total length of the core & the exact size of your new core ends, if it's small enough some 7/16 soft iron bar caps could be produced to hold it where it's needed.
Make it idiot proof and someone will make a better idiot.
User avatar
Jerry In Maine
Posts: 140
Joined: Thu Aug 12, 2010 3:19 am
Location: Surry, Maine USA

Re: Villiers Coil Substitution

Post by Jerry In Maine »

i had an old chainsaw languishing in storage, so i took a look at its ignition. it has no breaker points - no capacitive discharge ignition, etc. just the flywheel, coil w/ a spark lead and wire that goes to the stop switch attached. still plan to visit the small engine shop to see what they'll send me home with

chuck uk:
the chainsaw seems to spark when the flywheel magnets are aligned with the coil or just afterward. interestingly enough the coil i have on the seagull appears to be doing the same thing. not sure if it has to do with the seagulls breaker points or not - but the effect seems to be similar. i'll look more into this. the wire on the saw coil goes to the stop switch, so i'm betting the wire on the coil i have in the seagull is for ignition kill
***
the welding of tabs on the shoes - or cheeks - is just a temp fix so i can spend time on the electrical/timing issues involved. when/if i find a suitable substitute coil i'll then work on getting it physically fitted up . i have a lathy, mill, and i even do a bit of metal casting in brass and aluminum so i'm sure something can be cooked up. i still that that tig welding is viable. tig is clean, no spatter, the heat applied is very controllable, and the filler material is iron will will pass the magnetic flux. its also easy/quick and reliable.

not arguing with you gents. please don't consider my replies as retorts. :wink:


edit: my last line could be misread.intended to say to the effect:

"i don't mean to sound argumentative..."
Last edited by Jerry In Maine on Mon Oct 11, 2010 7:32 pm, edited 1 time in total.
User avatar
Charles uk
Posts: 4972
Joined: Wed Feb 27, 2008 4:38 pm
Location: Maidenhead Berks UK

Re: Villiers Coil Substitution

Post by Charles uk »

Arguing is good! we're all human therefore we make mistakes, me especially!

Insulate the "stop button wire, does it still spark? if not earth it.

Put it back together & make it run, if there's a spark but won't run loosten the base plate locking screw & rotate it in 10 degree steps till it will run, it will start over a 40 degree ish window, fine tune it till it starts well & runs good under full load, screw in the locking screw , should leave a witness mark, make a new dimple, & test before it gets too cold.
Make it idiot proof and someone will make a better idiot.
Post Reply