Time for the Riptide.
Moderators: John@sos, charlesp, Charles uk, RickUK, Petergalileo
-
erle bartlett
- Posts: 45
- Joined: Thu Dec 18, 2014 8:37 am
- Location: st georges basin
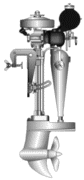
Time for the Riptide.
Now that the spanners are out for the new Seagull and with the fingernails dirty, it's time to have a serious look at the Riptide. I'm in need of the relevant technical data to apply. Stuff like spark plugs, fuel/oil ratio, grease to use in the various nipples and how to approach the ignition advance/retard lever for starting and running, any of that sort of stuff. Please.

-
erle bartlett
- Posts: 45
- Joined: Thu Dec 18, 2014 8:37 am
- Location: st georges basin
Re: Time for the Riptide.
Yup, that's the model.
-
Collector Inspector

- Posts: 4183
- Joined: Sun Jun 29, 2008 4:32 am
- Location: Perth Western Australia
- Contact:
Re: Time for the Riptide.
Yep good info what I did for that post................Thank you Hugo.
Erle
PM me for owners manual copy.
B
Erle
PM me for owners manual copy.
B
A chicken is one egg's way of becoming others
-
Collector Inspector
- Posts: 4183
- Joined: Sun Jun 29, 2008 4:32 am
- Location: Perth Western Australia
- Contact:
Re: Time for the Riptide.
And Post Pics
We all like pics.
B
We all like pics.
B
A chicken is one egg's way of becoming others
-
Collector Inspector
- Posts: 4183
- Joined: Sun Jun 29, 2008 4:32 am
- Location: Perth Western Australia
- Contact:
Re: Time for the Riptide.
User Manual sent.
Pics Pics
B
Pics Pics
B
A chicken is one egg's way of becoming others
-
erle bartlett
- Posts: 45
- Joined: Thu Dec 18, 2014 8:37 am
- Location: st georges basin
Re: Time for the Riptide.
User manual recieved and printed, thank you!
Now the fun begins. First job, pinhole in fuel tank.
What I would like is a socket for the central nut for starting with a drill purposes. I don't want to grind the original into a hex nut so I'll see if I can find a hex nut to fit the thread.
Now the fun begins. First job, pinhole in fuel tank.

What I would like is a socket for the central nut for starting with a drill purposes. I don't want to grind the original into a hex nut so I'll see if I can find a hex nut to fit the thread.

-
Collector Inspector
- Posts: 4183
- Joined: Sun Jun 29, 2008 4:32 am
- Location: Perth Western Australia
- Contact:
Re: Time for the Riptide.
There is no socket for the flywheel nut...................use a large adjustable at least 14"........a light tap with a mallet on the end will loosen it.
The screws for the top plate.................just use an impact driver gently. They will come out and the plate lifts off for ignition adjustment/check without removing the nut.
Please have the correct tools...............important.
Good luck post more pics...................maybe one or two of the motor aye?
Have fun
B
A chicken is one egg's way of becoming others
Re: Time for the Riptide.
Hopefully it wont be too much longer before a riptide or two are added to my collection also.
Got my training wheels on and will be watching this thread with great interest.
Hope it progresses well for you.
Got my training wheels on and will be watching this thread with great interest.
Hope it progresses well for you.
www.vintageoutboardsaustralia.blogspot.com
Re: Time for the Riptide.
Try and get one of the horizontally opposed twins. They sound great.
https://www.youtube.com/watch?v=-DEZehM9J-Y
https://www.youtube.com/watch?v=-DEZehM9J-Y
-
erle bartlett
- Posts: 45
- Joined: Thu Dec 18, 2014 8:37 am
- Location: st georges basin
Re: Time for the Riptide.
The flywheel nut comes off easily enough, so do the top plate screws, but as I recall from some years ago, the flywheel is solid and needs to come off to look at the sparky stuff.Collector Inspector wrote:There is no socket for the flywheel nut...................use a large adjustable at least 14"........a light tap with a mallet on the end will loosen it.
The screws for the top plate.................just use an impact driver gently. They will come out and the plate lifts off for ignition adjustment/check without removing the nut.
I would like to find a hex nut with the same thread as the flywheel nut to use for drill starting without working up blisters from a rope pull.
Re: Time for the Riptide.
Not a good idea starting a motor with a drill. Can be dangerous. I learnt the hard way. The motor fires up with the drill attached and with the motor driving the drill the pressure on the socket makes it hard to release, so here you are with the motor running at half throttle you are hanging on to drill with both hands trying to lift off as well as stopping it rotating and you are wondering how the heck you are going to get the throttle down to idle! Usually you have your finger on the drill trigger which will depress further to add to the chaos. Not a nice place to be. If going down this track definitely have someone to a) pull the plug on the drill b) cut the motor throttle. Then there is the scenario of the socket half on the nut at an angle with drill detached and socket flying off.... Happy Christmas!
Eris..... is the Greek goddess of chaos, strife and discord. I think she has visited us all at some time with our motor passion
Eris..... is the Greek goddess of chaos, strife and discord. I think she has visited us all at some time with our motor passion
-
erle bartlett
- Posts: 45
- Joined: Thu Dec 18, 2014 8:37 am
- Location: st georges basin
Re: Time for the Riptide.
Here are some pics of what I've been up to with the Riptide.
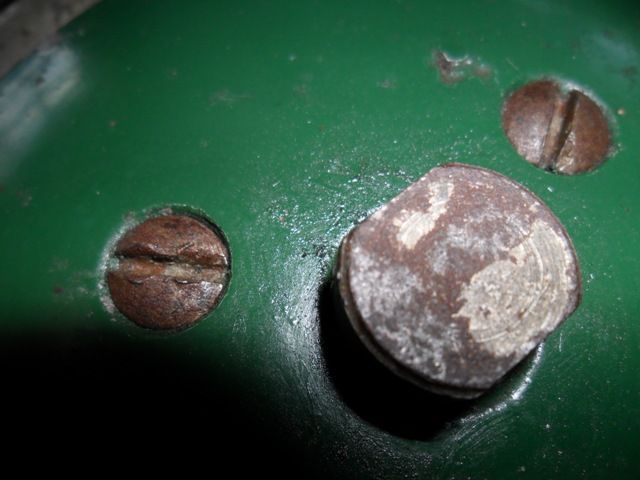
Top plate removed, showing the flywheel. Is this what you expected CI?
Any way, I took off the flywheel nut and removed the flywheel to look at the sparky bits.
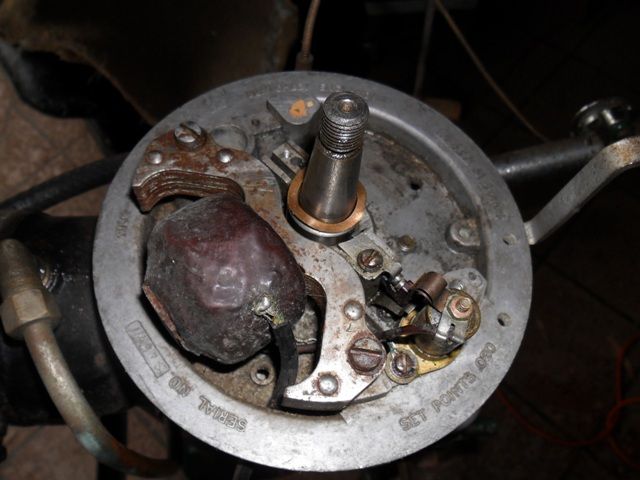
A little bit of rust and some corrosion on the HT lead, but not too bad.
Here's a closer look at the points, I gave them a clean up.
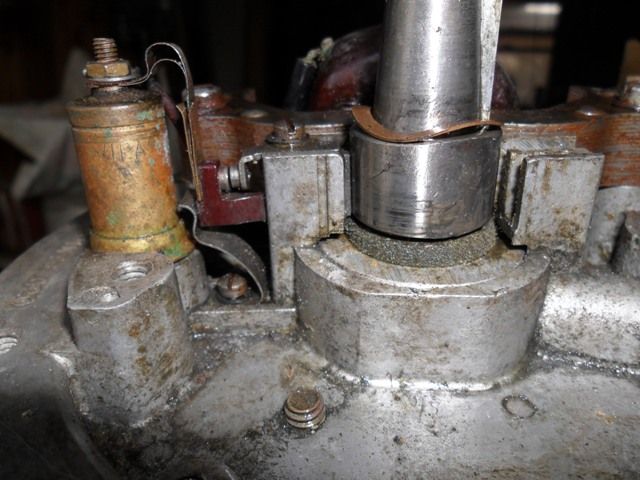
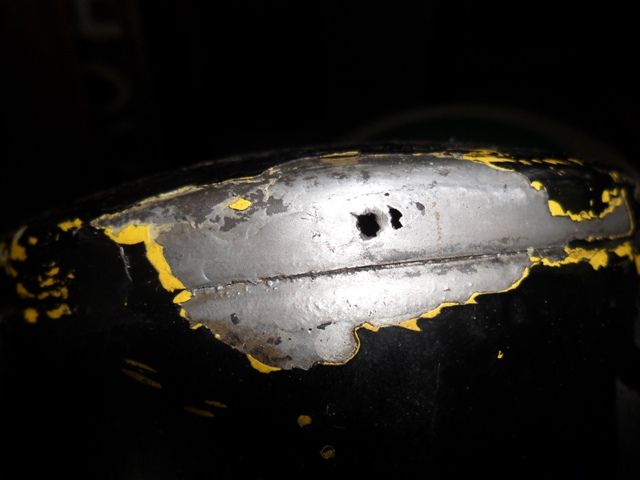
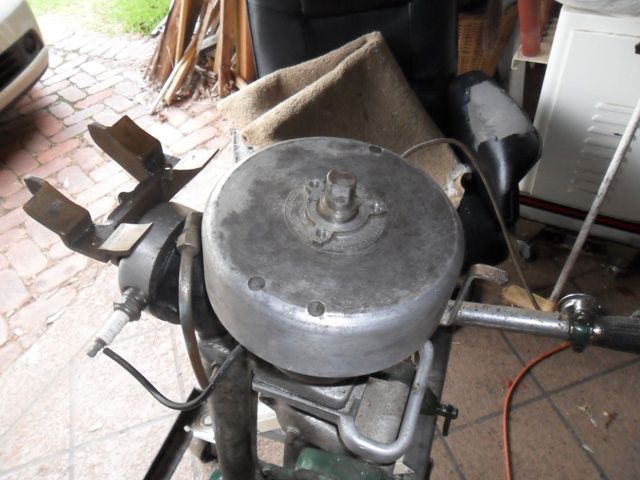
And here's everything back together. You'll see that I have been busy with a razor blade, removing the black paint fron the fuel tank. One of those jobs you can do in the middle of the night or 4am without disturbing either the neighbours or SWMBO.
At this stage I tried for a start. Actually got it to run for about 3 seconds. After that I just got blisters. Oh for a hex nut on the top!
And here's a pic of the serial number.
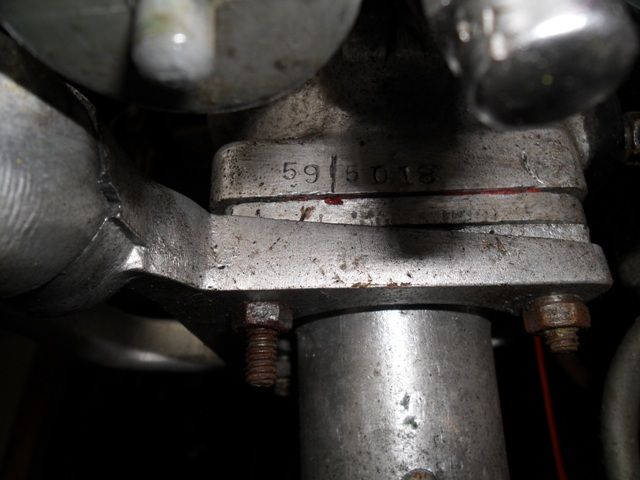
59/5018. I wonder what they represent.
By the way, could anyone with one of these machines please let me know what sparking plugs you have in use. No specific info in the manual so graciously emailes to me by CI.

Top plate removed, showing the flywheel. Is this what you expected CI?
Any way, I took off the flywheel nut and removed the flywheel to look at the sparky bits.

A little bit of rust and some corrosion on the HT lead, but not too bad.
Here's a closer look at the points, I gave them a clean up.

And here's everything back together. You'll see that I have been busy with a razor blade, removing the black paint fron the fuel tank. One of those jobs you can do in the middle of the night or 4am without disturbing either the neighbours or SWMBO.

At this stage I tried for a start. Actually got it to run for about 3 seconds. After that I just got blisters. Oh for a hex nut on the top!
And here's a pic of the serial number.

59/5018. I wonder what they represent.
By the way, could anyone with one of these machines please let me know what sparking plugs you have in use. No specific info in the manual so graciously emailes to me by CI.
-
Charles uk
- Posts: 4955
- Joined: Wed Feb 27, 2008 4:38 pm
- Location: Maidenhead Berks UK
Re: Time for the Riptide.
That's a Wico-Pacy ignition.
There's a 2 cylinder version (2 lots of yours) sitting in a box at my feet waiting for some attention, that came off an Anzani that I'm trying to find a contact breaker for.
There's a 2 cylinder version (2 lots of yours) sitting in a box at my feet waiting for some attention, that came off an Anzani that I'm trying to find a contact breaker for.
Make it idiot proof and someone will make a better idiot.
-
erle bartlett
- Posts: 45
- Joined: Thu Dec 18, 2014 8:37 am
- Location: st georges basin
Re: Time for the Riptide.
Somewhat later the same day....
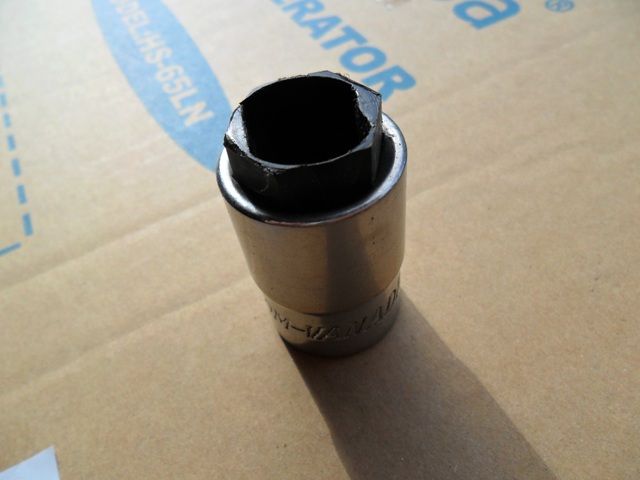
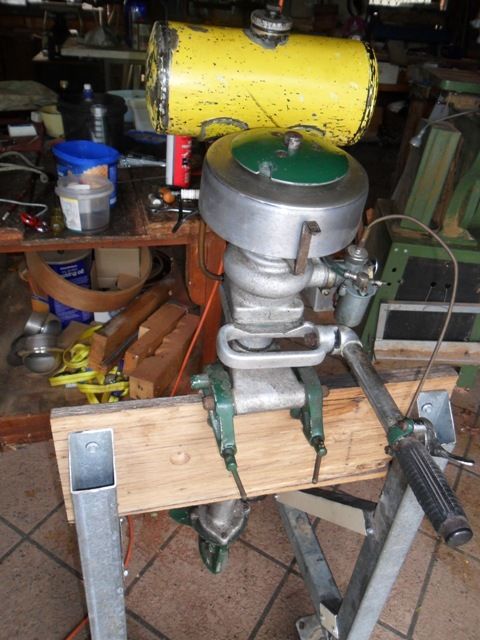
It's a bit untidy, but this is a piece of delrin, drilled and filed internally to fit the flywheel nut and formed externally to fit this socket. (A bigger socket would have been better but nevermind for now.)
Here it is ready for action!
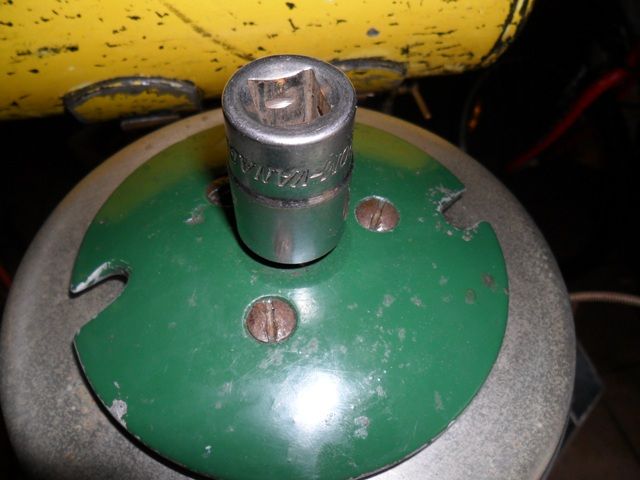
And away it went!!
Just ran for a very short period dry, so will work on the cooling tomorrow and restart in a bucket.